
With distance learning going into full effect around the country, we need to take a step back from our digital learning tools and get a bit more creative. The kitchen has always been a go-to place for me when working on fun science lessons. Not only is the kitchen the heart of the home, but it is a fantastic place to experiment and explore. Think of it…you have math, science, engineering and technology all happening in one place. I thought why not start my first Kitchen Science blog with one of my favorite foods, ice cream! This delicious, tasty treat comes in so many textures and flavors. Whether it is gumball, mint chocolate chip or pistachio, all ice cream starts with the same main ingredients. Below is a simple recipe and steps to making ice cream.
Here’s a link to Google Slides The Science of Ice Cream for project-based learning lessons with a focus on Science, Innovation and Entrepreneurship and a video that shares ideas on how to take a break from online learning to incorporate a little creativity! Why Make Ice Cream?

Making ice cream is a great way to learn about States of Matter, freezing points, chemical and physical reactions and how emulsification can be used to make ice cream smooth and creamy. Using the engineering design process with the understanding of how ice cream ingredients work, students can dig into their creative side and make a new tasty treat! Each slide will take you through the process. From resource links about the science of making ice cream, to innovating a new product through using the Engineering Design Process and supporting essential skills and ELA with entrepreneurship this project will keep your students engaged, focused and help them to develop skills that support distance learning.
I have also included additional resources from Cohesion Education with video resources that can help parents and  teachers to connect key ideas and standards from distance learning lessons to this project. There is a link that includes free access! Once you’ve worked your way through the project, share your results through a multi-media platform. Links for Buncee and Flipgrid are also included. If you don’t want to get too technical, create a Google slide deck to share or post some pictures with captions about what your students learned.
I’ve also included a link to my good friend from  The Library Voice, Shannon McClintock Miller. Be sure to check out her great ideas and resources for books, multi-media platforms and more!
We are venturing into a whole new way of learning and life. It’s important to remember that learning through doing is what supports a greater depth of knowledge, sparks creativity and eases tension. Have some fun and allow your students to take the lead. Make them the project managers! If you have any questions you can always reach out to me at www.missscience.com
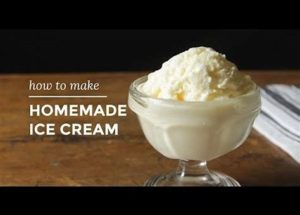
Making Ice Cream:
What you’ll need:
- Quart sized baggies (zipper seal works best)
- Half and Half
- Ice
- Rock Salt
- Vanilla
- Sugar
- Large plastic jar or canister (at least ½ gallon)
Procedure:
Fill the jar half-way with ice (the smaller the pieces the better) and then add ½ a cup of rock or ice cream salt. Tighten the lid and shake the jar for approximately 3-5 minutes. By shaking the jar you are melting the ice and lowering the temperature to approximately 15 degrees F (below the freezing point of water).
Next fill the baggie with 1 cup of Half and Half, 2 tablespoons of sugar and 1 teaspoon of vanilla. Remove as much air from the bag as possible (this will prevent the baggie from accidently popping). Then place the baggie inside of another baggie removing the air. The second baggie will help to prevent the melted water solution from getting into your ice cream mixture. Place the baggies with the ice cream mixture inside of the jar and seal the lid tightly.
You might want to use mittens or gloves for the next step. It gets REALLY cold! Now Shake, Shake, Shake and Rock n’ Roll that Jar! You will need to do this for about 10-15 minutes. Yes…I told you it was going to get cold!!!!
Once your mixture is frozen (or your arms are very, very tired) remove the baggie from the jar. Be sure to rinse the baggies with cold water to remove any salt residue. Salty ice cream can be a little yucky!
Now you can eat your ice cream right out of the bag or share with a friend. ENJOY!
What’s So Scientific about Making Ice Cream?
When salt is used on ice it lowers the freezing point of the ice. Water freezes at around 32 degrees F, but when you add salt (depending on the percent) you lower the temperature. Some of the ice will melt because you lowered the freezing point. For example, a 10% salt solution will freeze at around 20 degrees F. Although your ice cream mixture is cold, it is still warmer than your ice and salt solution. The “heat” from the ice cream mixture is absorbed by the ice and that is what allows your ice cream mixture to freeze at a temperature that is below 32 degrees F!